


How the "Sauce" is made, a sticker making guide:
I started off on redbubble uploading designs using a "fire and forget" mindset. As my profit margins either meant I got basically nothing or the customer had to pay way too much, I didn't really put much effort into the redbubble market place. Then last summer I got the idea to print using an online service (customstickers.com) and got a lot of attention in my meat-space social circles. So I decided to do a couple runs like that and sell on Etsy instead of thru a "print-on-demand" service. Immediately, I noticed this was a much more viable option and I decided to get a printer and cutter so I could cut the middle man out and save a ton of money long term in production cost while keeping prices down for the customer. If I could give them away for free and not worry about food and a roof over my head, I would.
Printing:
I use an Epson ET-2750 to print onto an 8.5"x11" sheet of sticker paper (I've had a lot of good luck with the brand HTVRONT for glossy/matte paper and QiXin for the holographic paper, but whatever you can source is probably pretty okay). I would recommend finding a newer/better model of printer if you can afford it, but mine is good enough for small to medium size stickers. It'll sometimes bleed ink on the paper or leave streaks on larger prints and image quality for photo prints is kinda lacking. I have no experience with other printers so I cannot soundly give advice here, other than to say that mine isn't terrible for a starter printer, but it ain't great either. If you're on a super low budget and love drawing with pens, then doodling right on the sticker paper also works!
Sealing:
After printing I always add a protective clear vinyl to the top of the sticker sheet. This helps protect the design for longer and make it more weather resistant. This step isn't necessary, but it only takes about a minute more and doesn't add too much extra cost for the long term benefit it offers. All one needs to do this is adhesive laminate, a cutting mat, some kind of felt squeegie, and a knife. You can find all kinds of tutorials on YouTube on how to do it (this one in particular being how I learned to do this), but the basic run down is: Clean the surface of the sticker paper, then slowly apply the adhesive layer across the sticker sheet making sure to keep it from bunching up or trapping air, then dragging a felt squeegie (or old library card) to firmly press the two layers together, trim excess edges down, and you're done!
Cutting:
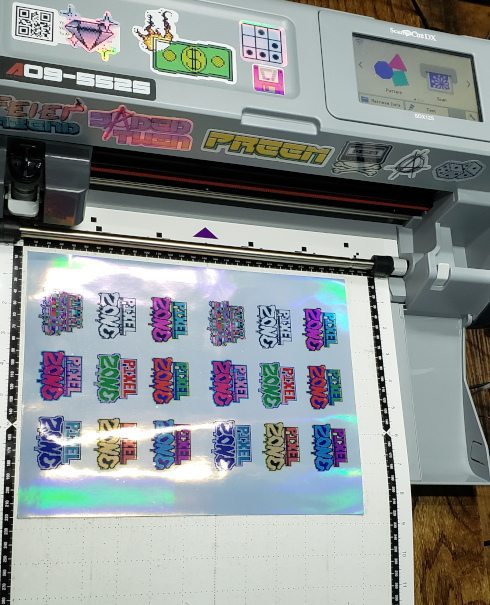
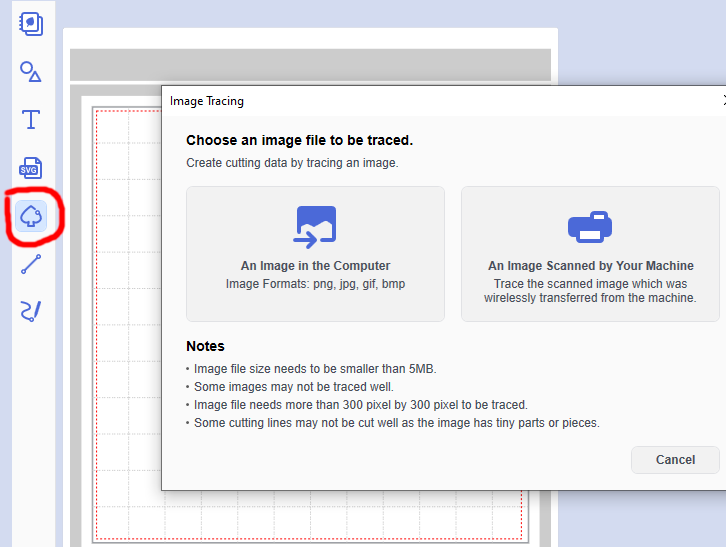
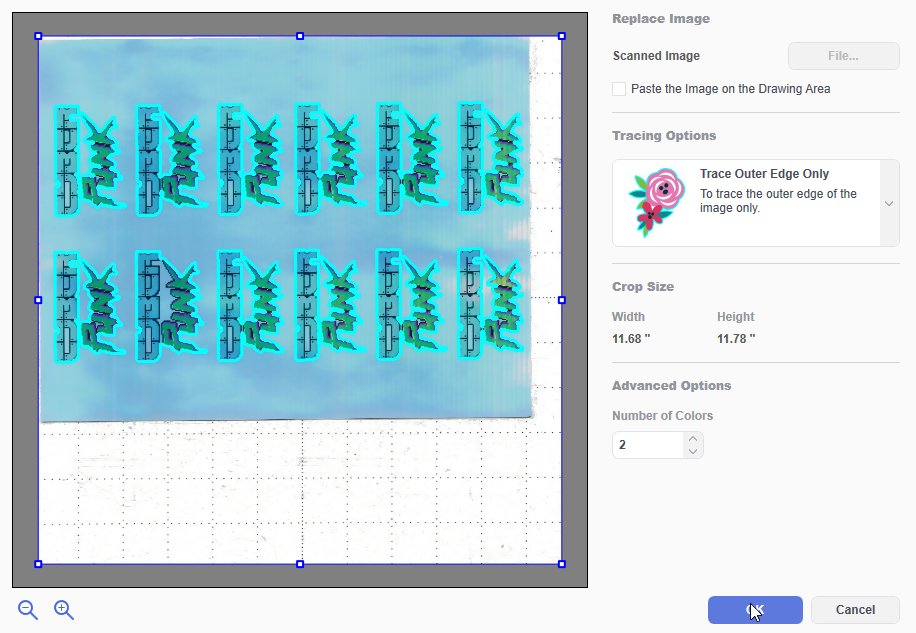
Once ready for cutting, I load the sheet into my Brother Scan-N-Cut DX (SDX125). The Brother is super nice and I prefer it over Cricut (for no other reason than I just do lol). All I do is stick the sticker paper on the feed sheet, scan it to my computer using the Brother, load up the CanvasWorkspace software and use the image tracing tool (in the version I use the button looks like the outline of a spade). I deselect the "Paste image on drawing area" option and set the number of colors to 2. Press preview to make sure everything looks good, and then the okay button.
Then I got into the editing options and offset the generated outlines to have a little overlap with the design and make any other adjustments necessary (such as making sure outlines don't overlaps or intersect each other or not to cuts spots that should't be cut). I export it and let the cutter do it's magic. Although, a pair of scissors and a bit of extra patience will work just as well. Once cut, they're ready for stickin!