


How I make Glitch Art:
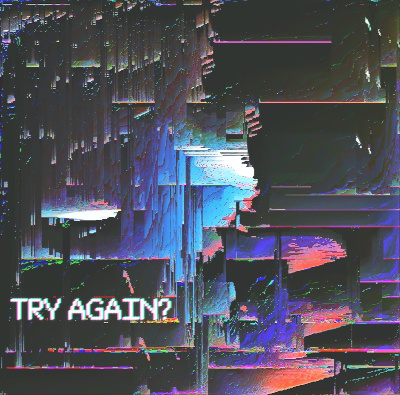
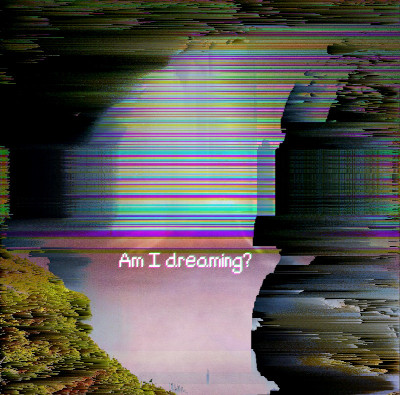
When doing glitch art, I mostly work off vibes and feel rather than a strict step-by-step process. Tho I do tend to gravitate towards a handful of particular effects and tools as I find them easy to work with as well as pleasing to my eyes. I start off with a sort of “seed” image that I think will work. Honestly anything will do (something from the net or just a random pic you took the other day). I try to at least choose something with either a clear pattern or shape to it. For example Fig. 1 was originally an image of my workbench lighting system with a bunch of smoke underneath it and Fig. 2 was two separate shots (a waterfall and a street at night). These original images still have strong outlines of those original shapes that help create an artistic balance. If there is no clear subject in the original seed image, then the final result could lead to just a lot of noise. But, this is just my process and what I find that works best for me. If noise is what you’re after, then go for it! Besides, experimenting with different images is 90% the fun of glitch art.
Now that you have a seed image, it’s time to corrupt it! There are a gorillion ways to a glitch an image and they’re all correct. There are a lot of apps and websites that make the process easier or you can grab your favorite hex editor and jumble the data around. Typically, out of laziness, I’ll use an app on my phone to create certain effects (The one I use is called Glitch! in the google play store, link below, but there are a ton out there so use whatever you find most convenient). These apps do exactly what you’d normally do manually with a hex editor or a script. They just streamline the process a bit for specific effects. I also like to import image files into Audacity and edit the images in there. The pixels end up getting treated as a waveform so applying different effects (eg. reverb, flange, etc.) can drastically alter the image. I don’t want to retread the same ground, especially when others have already made much better tutorials than I could, so I’ve included a list of great resources and tutorials to get you started at the bottom. Although there’s a few things to keep in mind if you’re using Audacity, a hex editor, or a script you (or someone else) wrote:
- Every image has a bit of information called a header that sits before the data that make up the pixels actually seen. This section of data tells the image viewer how to read the file. If you mess with this part of the file it will become too corrupted to be seen and ruin the image file. The size of the header varies depending on the file type. If you’re curious you could google the data structure of whatever file you’re working on to get a good idea of what you can do. Or you can blunder through the process like me and make lots of mistakes lol
- I advise sticking with lossless files like .bmp or .png. It makes the process easier (and in some cases only possible) to avoid compressed files like a .jpg.
- In my experience, it’s okay to add extra bits of data to a file. So for example if I have an image open in Audacity and copy a middle section of an image and paste it a couple times it will repeat that part of the image. If I were to just cut the section out entirely it will likely corrupt the file too much. Although, making the file too big can also have disastrous consequences, so try not to mess with the total size of the file too much.
- I highly advise making copies of the image you’re working with throughout the whole process. Even if you’re just using an app. It’ll help you track what action has what effect on the image (especially when working in Audacity or a hex editor). It’s also a bit like save scumming for art. You never know when you turn around a corner you didn’t mean to just yet!
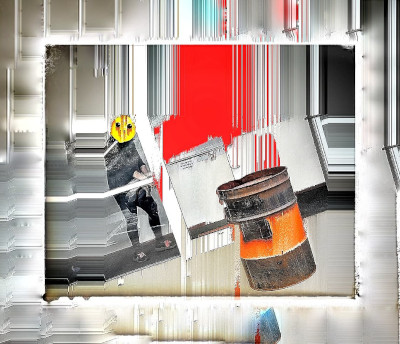
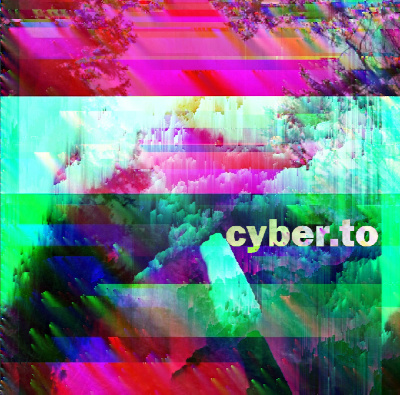
After I’ve gotten to a good spot with the databending, I usually throw the image into a photo editor (Snapseed on my phone or the GIMP on my computer). Again, this is all vibes based, so you don’t even have to do any further editing if you don’t want to. Often times I’ll pump up the saturation, brightness, and sharpening. I find that it makes my images feel more “glitchy”. Something I like to do in Snapseed is expanding an image and turning on the “smart fill” so that instead of a solid color border it ends up creating ghost images of what’s at the edge of the picture. If you add a small black border before using the smart fill, you can create an interesting framing effect (Fig. 4). Another thing to help create more glitchy chaos to your image is layering 2 or more glitched images in your favorite image editor and fiddling with the mode and opacity settings. Fig. 2 has a picture of a waterfall that has a lot of pixel drifting and above it is a picture of a street at night that has been color shifted. The street photo was then set to “darken only” to create what you see now. Fig.3 is also 2 stacked images but I forgot what they originally were.
Further Reading:
What various effects in Audacity do to an image
Pixel Sorting (the smearing effect)